
Friday, September 13, 2013
A new orphan has come to stay
Right now we are working to get her eating the amount she needs. We had to put food in her mouth the first day and did once the second. She seems to eat on her own now - not as much as we want her to, yet. Hopefully that goes well, then we will continue from that point.

Wednesday, September 4, 2013
Trying something new
One of the boys wants to learn taxidermy, so we included that for one of his subjects this year. Right now he likes taxidermy better than Physics, Math, American Lit, and History. LOL Kind of figured he would. Choir, Bible and Phy Ed have always been subjects he has enjoyed.
Anyway - he found a site that discussed egg tanning. So, since he has the hides (he has been collecting all summer to get ready for this year), he is giving it a shot. So far, interesting. I forgot to take photos of the fleshing/drying/washing/rubbing egg in, but if it works, he wants to try with another sheep hide. One note - he did read that sheep hides would work with this, but something like a deer hide won't - because of thickness.
Why egg tanning? We have an overabundance of eggs right now. The old girls are really laying, so we are using those eggs to process the sheep hides.
Hoping to be able to smoke the hide (wool on) this weekend without burning it!
Sunday, April 7, 2013
Another time with mom
We want the little ones to maintain contact with mom as much as possible, but still being careful to not get them too cold.

 Mom does get up and excited to see them, but has a lot of trouble moving. She still likes her babies, but they will be getting regular bottles and nurse what they can. With only one good 1/2 of her bag, it won't be much, so we are going with the idea, she can 'watch' her babies, but not relying on her to feed these little guys.


Saturday, April 6, 2013
Hypothermia in Lambs
Note: Scrappy, the calf, is living outside in the barn and loves all her freedom to run and play. We kind of spoil this bottle baby as she is let out for bottle time to run and play with the Great Pyr's.
On to the next phase - bottle lambs. SOME PHOTOS ARE GRAPHIC - DO NOT LOOK IF YOU ARE DISTURBED BY ANIMALS IN THIS MANNER. I am posting these for reference only as our lambs are doing fine now. God definitely was helping. We named the ewe lamb Mary (short for Miracle) and the ram lamb Marty (one of the kids ideas of short for Miracle).
Two orphans - not unusual, not normal, but very do-able. Just over three pounds each, but now they are a week old and doing well.
Then the storm hit and one of the twin lambs who looked fine at 3, did not by 7 pm. She came in and I don't have photos of her, but then her brother went down. The mom has plenty of milk, but had hurt herself after evening chores. Still not sure how she hurt her front leg in the pen, but she did and so won't get up as often as needed for the one twin we left with her. Of course it happens at night and we had cold, rain and snow. Even in the sheltered lambing jug, lambs that are only a few days old need to eat more often than mama was feeding. He was sleeping by her at 3:30 a.m, we didn't check again until 7:30 and he was in really bad shape. Looking back - of course we wish we had checked sooner - poor management decision due to feeding babies every three hours the past week. So, we find him in a hypothermic condition. Basically - they look dead, but we could feel the heartbeat still going. After getting his sister to come along, I realized I wanted to take some photos (especially if this all worked out).
The next few pictures are not wonderful, but after dealing with a calf with hypothermia, I hope they are helpful. I didn't take any until after working with the baby for about an hour or so (didn't think of it sooner - too busy). We didn't have the means for an IP shot of glucose into the abdomen, but did use corn syrup on the gum lines like we did with his sister the night before. Ended up using about one once per lamb. Just dip finger in and rub along gums. Be sure to have a damp towel handy to wipe off.
While doing this, lamb on pad with heating pad and towel covering - warm VERY SLOWLY. They need the glucose from the syrup to absorb into their body so they have something to metabolize while being warmed up.
The female lamb started showing minor improvement every 5 minutes with this method. The male took much longer, but after about an hour, he could start to hold his head without the flopping. Remember - if the lamb cannot hold its head up at all DO NOT TUBE IT.
At the point below - this is about 45 minutes in with the ram. I sure didn't think he would survive. I didn't have his temp at this point - wish I did, but did not as I was dealing with two lambs as his sister was a bit more lively.


About 2 hours into everything - he can hold his head between his front legs. This is huge - as I remember his sister - once she did this (20 minutes in) started progressing more rapidly. She kept coming by to see what was up - then would go back and lie down for another nap.


Still looking really good. Just short bursts of time, but he is 'steady' (shaky, but has control).

At 15 minutes, he is still able to control his head, so we tubed him. I did add a bit of karo syrup to his first feeding (vet's advice). He went to sleep within just a few minutes. Knowing how to place a feeding tube into an animal is an important skill to have in your arsenal. Just go slow and take your time. One video (huge thanks to creator - I don't know him, but appreciated this the first time I saw it - about 2 years ago) can be found here: http://www.youtube.com/watch?v=PEJX91unbaQ

One hour later, he is looking much better. I tubed him again. I only used 2 ounces at a time. I realize they can eat more, but I know many small meals are better for baby lambs than multiple large meals, so this is just the choice I made.

After his second tubing - he can hold his head much better now.


The ram lamb had started baahing after a nap after the second tubing. When offered a bottle, he drank 5 ounces on his own. Then we let him sleep. Here he is two hours later - he got up to urinate and drank another 5 ounce bottle on his own. His sister had almost the identical recovery, just much faster to her first bottle.


Another note regarding recovery. The ewe lamb got up and was walking and just didn't want to stop moving. Like when little lambs are tired and won't lie down. We did take her and put her into a dog kennel we have and she finally took a nap as there was no where to go. Since then, her brother has recovered enough to get around and they take naps together after each bottle. Pretty much - if they aren't eating - they are sleeping right now.
PS - I am not an expert in lambs by any means, but just went with our veterinarians advice (long distance away) and what was available. This is the first year we have had domestic type sheep and the other lambs have not had any issues like this. I am guessing these are not typical issues, and while I hope to never deal with lambs that have hypothermia again, I did want a record that I can find if needed. I also hope to learn about how to do inter-parentenial injections.
On to the next phase - bottle lambs. SOME PHOTOS ARE GRAPHIC - DO NOT LOOK IF YOU ARE DISTURBED BY ANIMALS IN THIS MANNER. I am posting these for reference only as our lambs are doing fine now. God definitely was helping. We named the ewe lamb Mary (short for Miracle) and the ram lamb Marty (one of the kids ideas of short for Miracle).
Two orphans - not unusual, not normal, but very do-able. Just over three pounds each, but now they are a week old and doing well.
Then the storm hit and one of the twin lambs who looked fine at 3, did not by 7 pm. She came in and I don't have photos of her, but then her brother went down. The mom has plenty of milk, but had hurt herself after evening chores. Still not sure how she hurt her front leg in the pen, but she did and so won't get up as often as needed for the one twin we left with her. Of course it happens at night and we had cold, rain and snow. Even in the sheltered lambing jug, lambs that are only a few days old need to eat more often than mama was feeding. He was sleeping by her at 3:30 a.m, we didn't check again until 7:30 and he was in really bad shape. Looking back - of course we wish we had checked sooner - poor management decision due to feeding babies every three hours the past week. So, we find him in a hypothermic condition. Basically - they look dead, but we could feel the heartbeat still going. After getting his sister to come along, I realized I wanted to take some photos (especially if this all worked out).
The next few pictures are not wonderful, but after dealing with a calf with hypothermia, I hope they are helpful. I didn't take any until after working with the baby for about an hour or so (didn't think of it sooner - too busy). We didn't have the means for an IP shot of glucose into the abdomen, but did use corn syrup on the gum lines like we did with his sister the night before. Ended up using about one once per lamb. Just dip finger in and rub along gums. Be sure to have a damp towel handy to wipe off.
While doing this, lamb on pad with heating pad and towel covering - warm VERY SLOWLY. They need the glucose from the syrup to absorb into their body so they have something to metabolize while being warmed up.
The female lamb started showing minor improvement every 5 minutes with this method. The male took much longer, but after about an hour, he could start to hold his head without the flopping. Remember - if the lamb cannot hold its head up at all DO NOT TUBE IT.
At the point below - this is about 45 minutes in with the ram. I sure didn't think he would survive. I didn't have his temp at this point - wish I did, but did not as I was dealing with two lambs as his sister was a bit more lively.
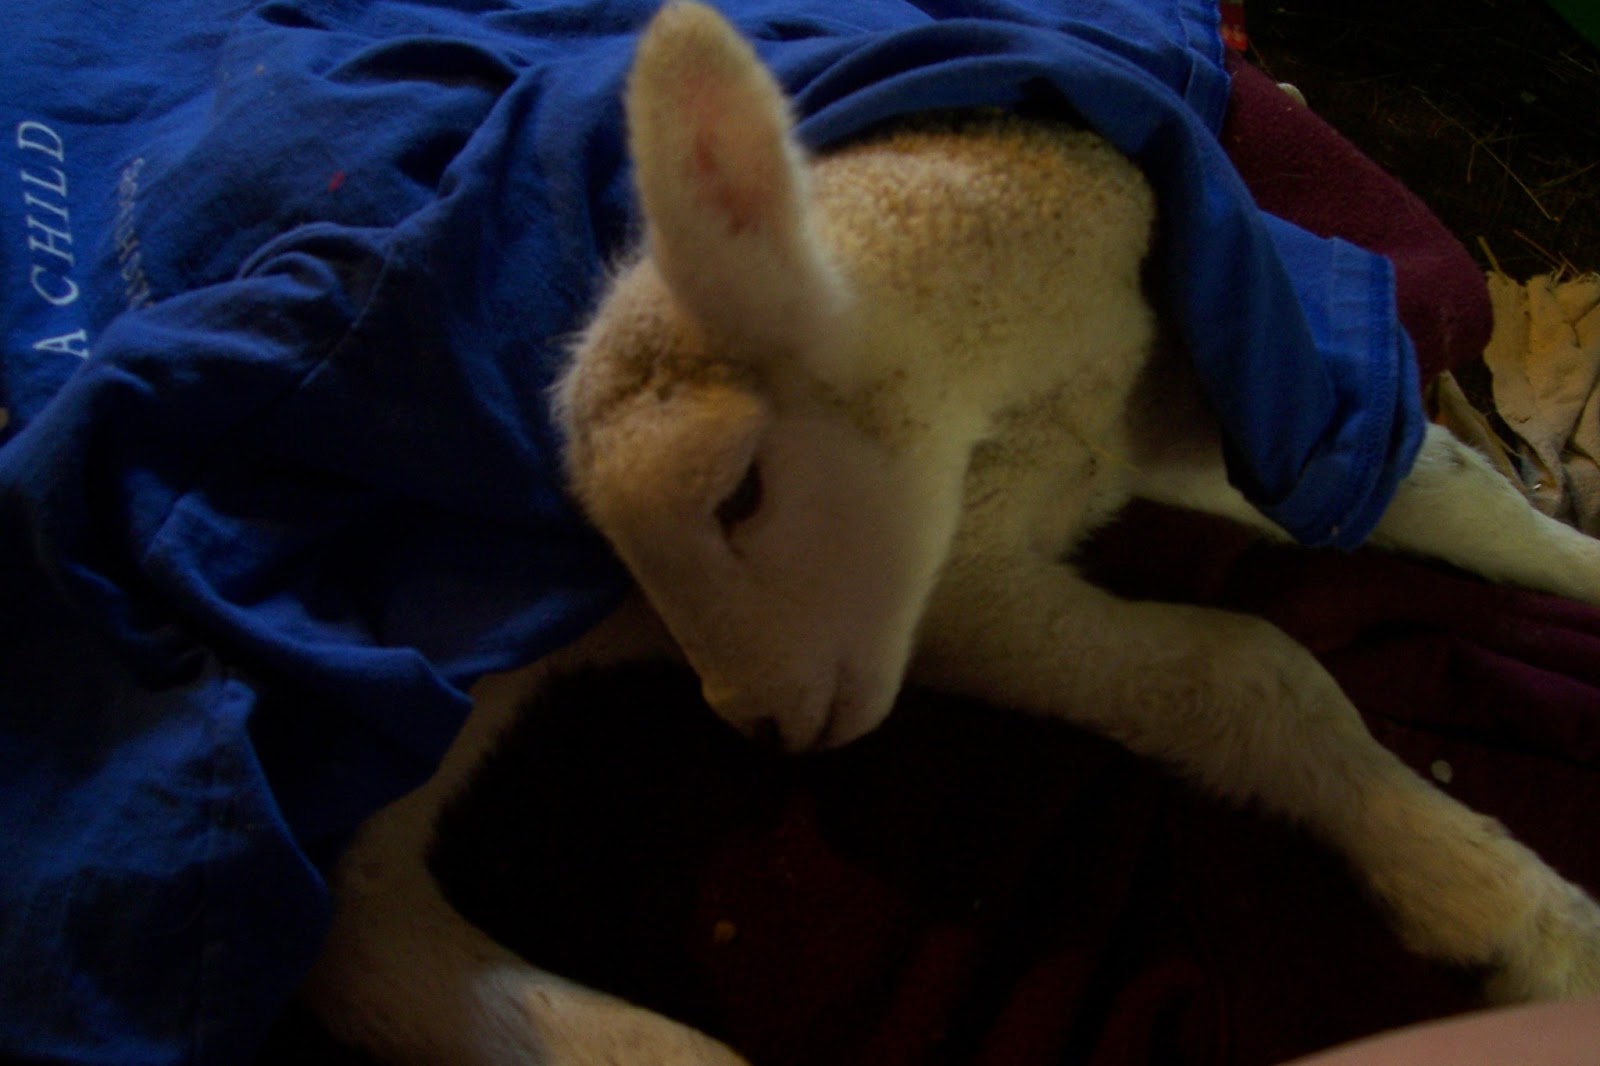
He cannot control his head, so I am continuing a finger tip of corn syrup to the mucus membranes (gums) in his mouth every 5-10 minutes. I also use a warm wash cloth to wipe his mouth every 15 minutes as it does get sticky. About 15 minutes later (and I changed up the heating pad position as well). Notice he keeps his head a little better. Still very little control, but hope is appearing. I remember reading somewhere - where there is life - keep fighting. So, we did.


He still couldn't hold his head up at this point, but it was no longer flailing back and forth if he tried to move it. So - continued the karo syrup and warming process. We do have a pellet stove in the basement where we brought them. Cranked it up (we are in t-shirts now to care for them as the room is really warm until their temperatures return to normal)
Then - almost two hours later - he held his head up! I waited about 10 minutes to be sure.

Still looking really good. Just short bursts of time, but he is 'steady' (shaky, but has control).

At 15 minutes, he is still able to control his head, so we tubed him. I did add a bit of karo syrup to his first feeding (vet's advice). He went to sleep within just a few minutes. Knowing how to place a feeding tube into an animal is an important skill to have in your arsenal. Just go slow and take your time. One video (huge thanks to creator - I don't know him, but appreciated this the first time I saw it - about 2 years ago) can be found here: http://www.youtube.com/watch?v=PEJX91unbaQ

One hour later, he is looking much better. I tubed him again. I only used 2 ounces at a time. I realize they can eat more, but I know many small meals are better for baby lambs than multiple large meals, so this is just the choice I made.

After his second tubing - he can hold his head much better now.

Our little ICU lambs and Spud. He is a crossbred from our 'wild flock' type lambs. The hardiness of these little guys is amazing when compared to the domestic lambs. However, the domestic lambs are much, much bigger. He is just checking them out. The ewe is on the blue cushion the ram is on the brown. No real reason for the cushion, other than ease of movement for us as there is not a ton of space when working. A few notes - it takes a while for lambs to return to normal temperature (101). Even with a warm room, they need some extra warmth until completely recovered. His sister, doing much better, still seems a bit chilled at times and took a nap on the heating pad.

The ram lamb had started baahing after a nap after the second tubing. When offered a bottle, he drank 5 ounces on his own. Then we let him sleep. Here he is two hours later - he got up to urinate and drank another 5 ounce bottle on his own. His sister had almost the identical recovery, just much faster to her first bottle.
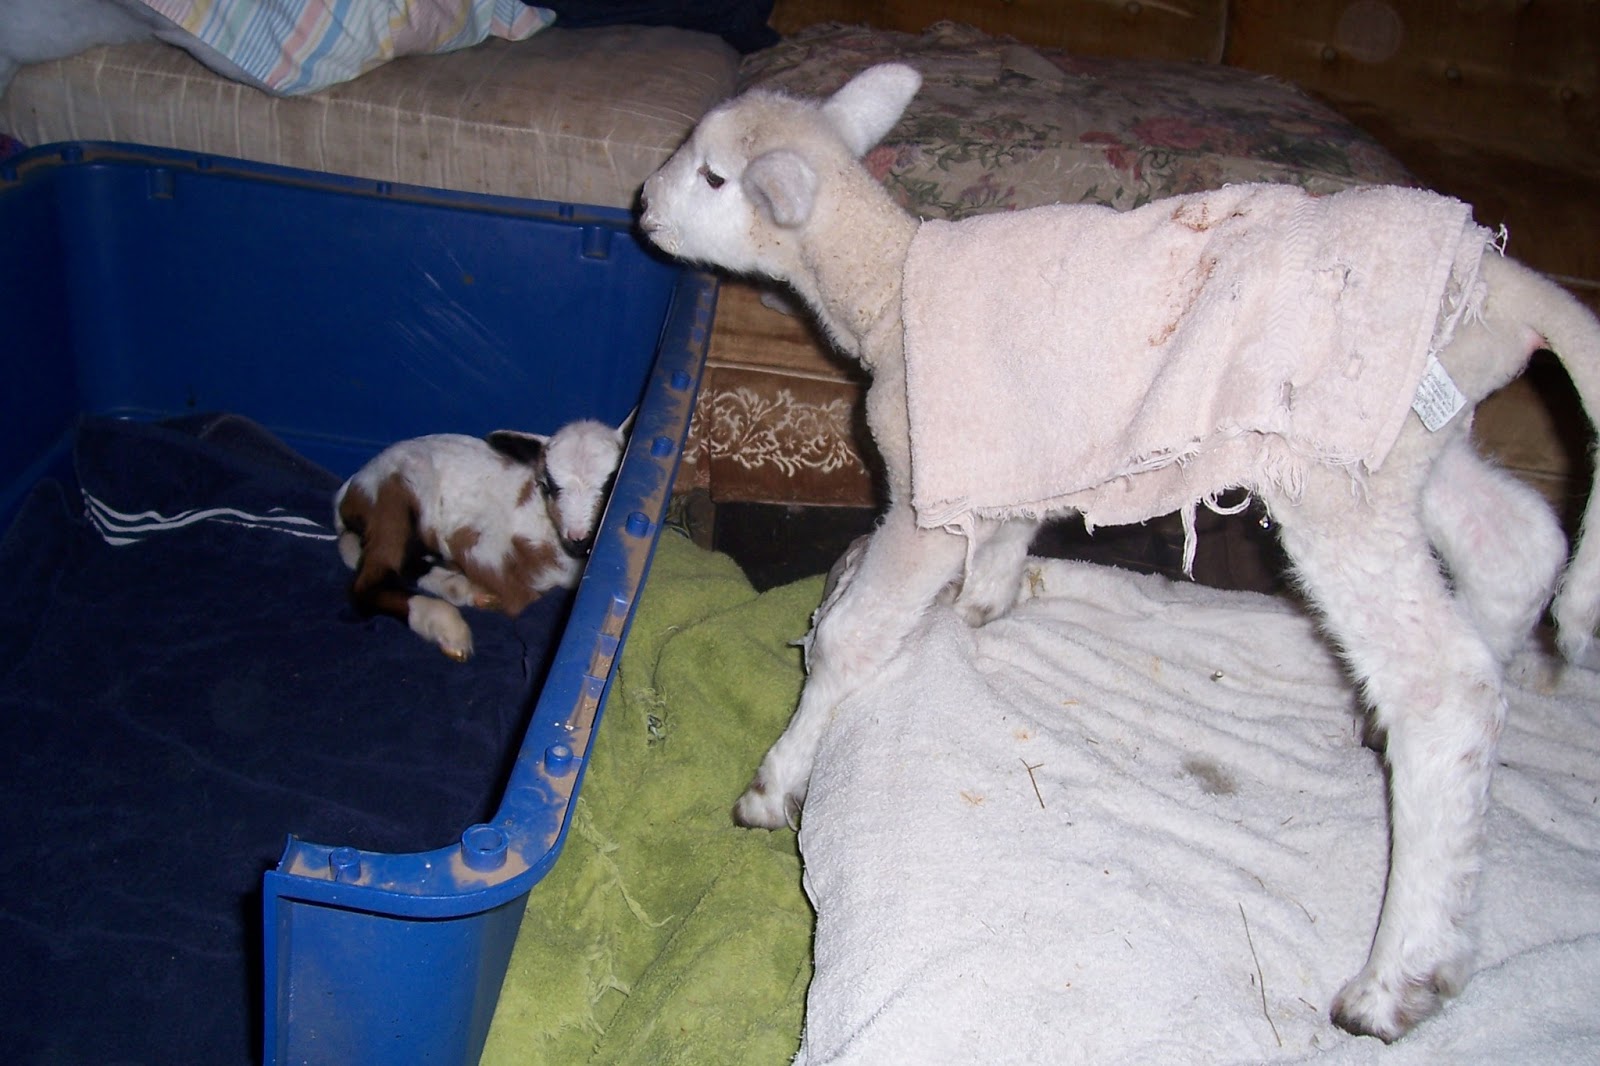
At this point, both lambs have been taking bottles routinely (every three hours). They appear to be recovering well. Their mom is doing a bit better, but still has trouble getting up and down. These guys may become permanent bottle babies, but we hope to try milking the ewe (as we have) more while she recovers.

Trying to catch four lambs on film in a small area isn't always easy. The Ram, Sparkle, Spud, and Mary. This is 12 hours later. Hopefully all continues. The white lambs have had 20 ounces so far and the little guys are on track where they belong. Figure to feed 15-20% of body weight for lambs. We will weigh the white lambs later tonight. For now, small meals are how we will keep going.

PS - I am not an expert in lambs by any means, but just went with our veterinarians advice (long distance away) and what was available. This is the first year we have had domestic type sheep and the other lambs have not had any issues like this. I am guessing these are not typical issues, and while I hope to never deal with lambs that have hypothermia again, I did want a record that I can find if needed. I also hope to learn about how to do inter-parentenial injections.
Monday, March 18, 2013
Another good sign
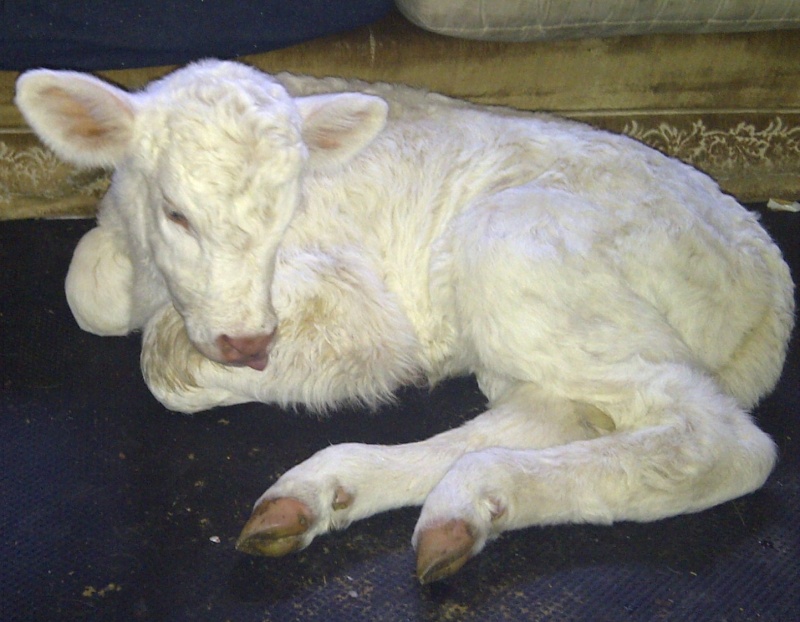
Potty break and another pint of milk. Now it is back down for a nap. If we can keep her eating a pint every two hours, that would be super. She still has some rather thin patches of hair and doesn't put her tongue back into her mouth all the time, but she is improving. We kind of think that we should have woken her up to feed her again last night - she went almost 8 hours without a feeding. Plus, got out from under her blanket. Kind of a calf ICU around here right now.

That mat she is on is an 4 x 8 foot dairy cow mat. We had it for our old lab. Outdoors in the winter with a heat lamp above so he would stay warm. Then when he was older and needed to be in the house, we moved it into the basement so he wouldn't have to lay directly on the concrete (unless by choice in the summer). It is nearly two inches thick, so makes a nice place for her that is also easy to clean and the textured surface keeps it from being too slippery. She isn't the first calf to use it. One other thing it works well for - exercising for humans. It has enough give that you don't hurt your knees and such when doing running in place or other exercises (when it isn't in use by a calf it makes a great workout mat).


That mat she is on is an 4 x 8 foot dairy cow mat. We had it for our old lab. Outdoors in the winter with a heat lamp above so he would stay warm. Then when he was older and needed to be in the house, we moved it into the basement so he wouldn't have to lay directly on the concrete (unless by choice in the summer). It is nearly two inches thick, so makes a nice place for her that is also easy to clean and the textured surface keeps it from being too slippery. She isn't the first calf to use it. One other thing it works well for - exercising for humans. It has enough give that you don't hurt your knees and such when doing running in place or other exercises (when it isn't in use by a calf it makes a great workout mat).
She looks better now

One step forward, two steps back in the Saga of Peanut Junior
MONDAY
Backsliding.
She didn't look good this am - even though she is in the house, she is acting like she is cold. We got her up and she drank her own bottle. Just over a pint, but at least she drank on her own.

Bad side - she fell over rather than laying down. Now she isn't looking so hot. But then, by the time we uploaded photos, she looked just awful again. So why put all this (and the bad photos) here? Because when dealing with hypothermia, one of the most helpful things, to me, was to see the various photos and journal entries I had made when we dealt with Peanut. It sounds weird, but it also lends hope - to know that with a lot of TLC, things can come along.
 After her bottle - out of juice and won't even turn her head like a normal calf to sleep. However, 1/2 hour later - she has her head up and looks better. Will see - it is always along 'game'. Ups/downs, continuous watching and lots of praying. Her calf jacket is getting washed - she still drools quite a bit.
Well, the camera is now charging - not even enough juice for a single photo. However, she is at least turning her head to sleep like calves normally do - with her nose pointed towards her body.
SUNDAY
Looking a lot better - we took some video as she is getting up and laying down on her own as well as trying to run, sort of, and jump and start sucking on anything that she wanted to explore! She drank 2 quarts and 1 pint today. Hopefully things will continue to improve.
SATURDAY
Improvement
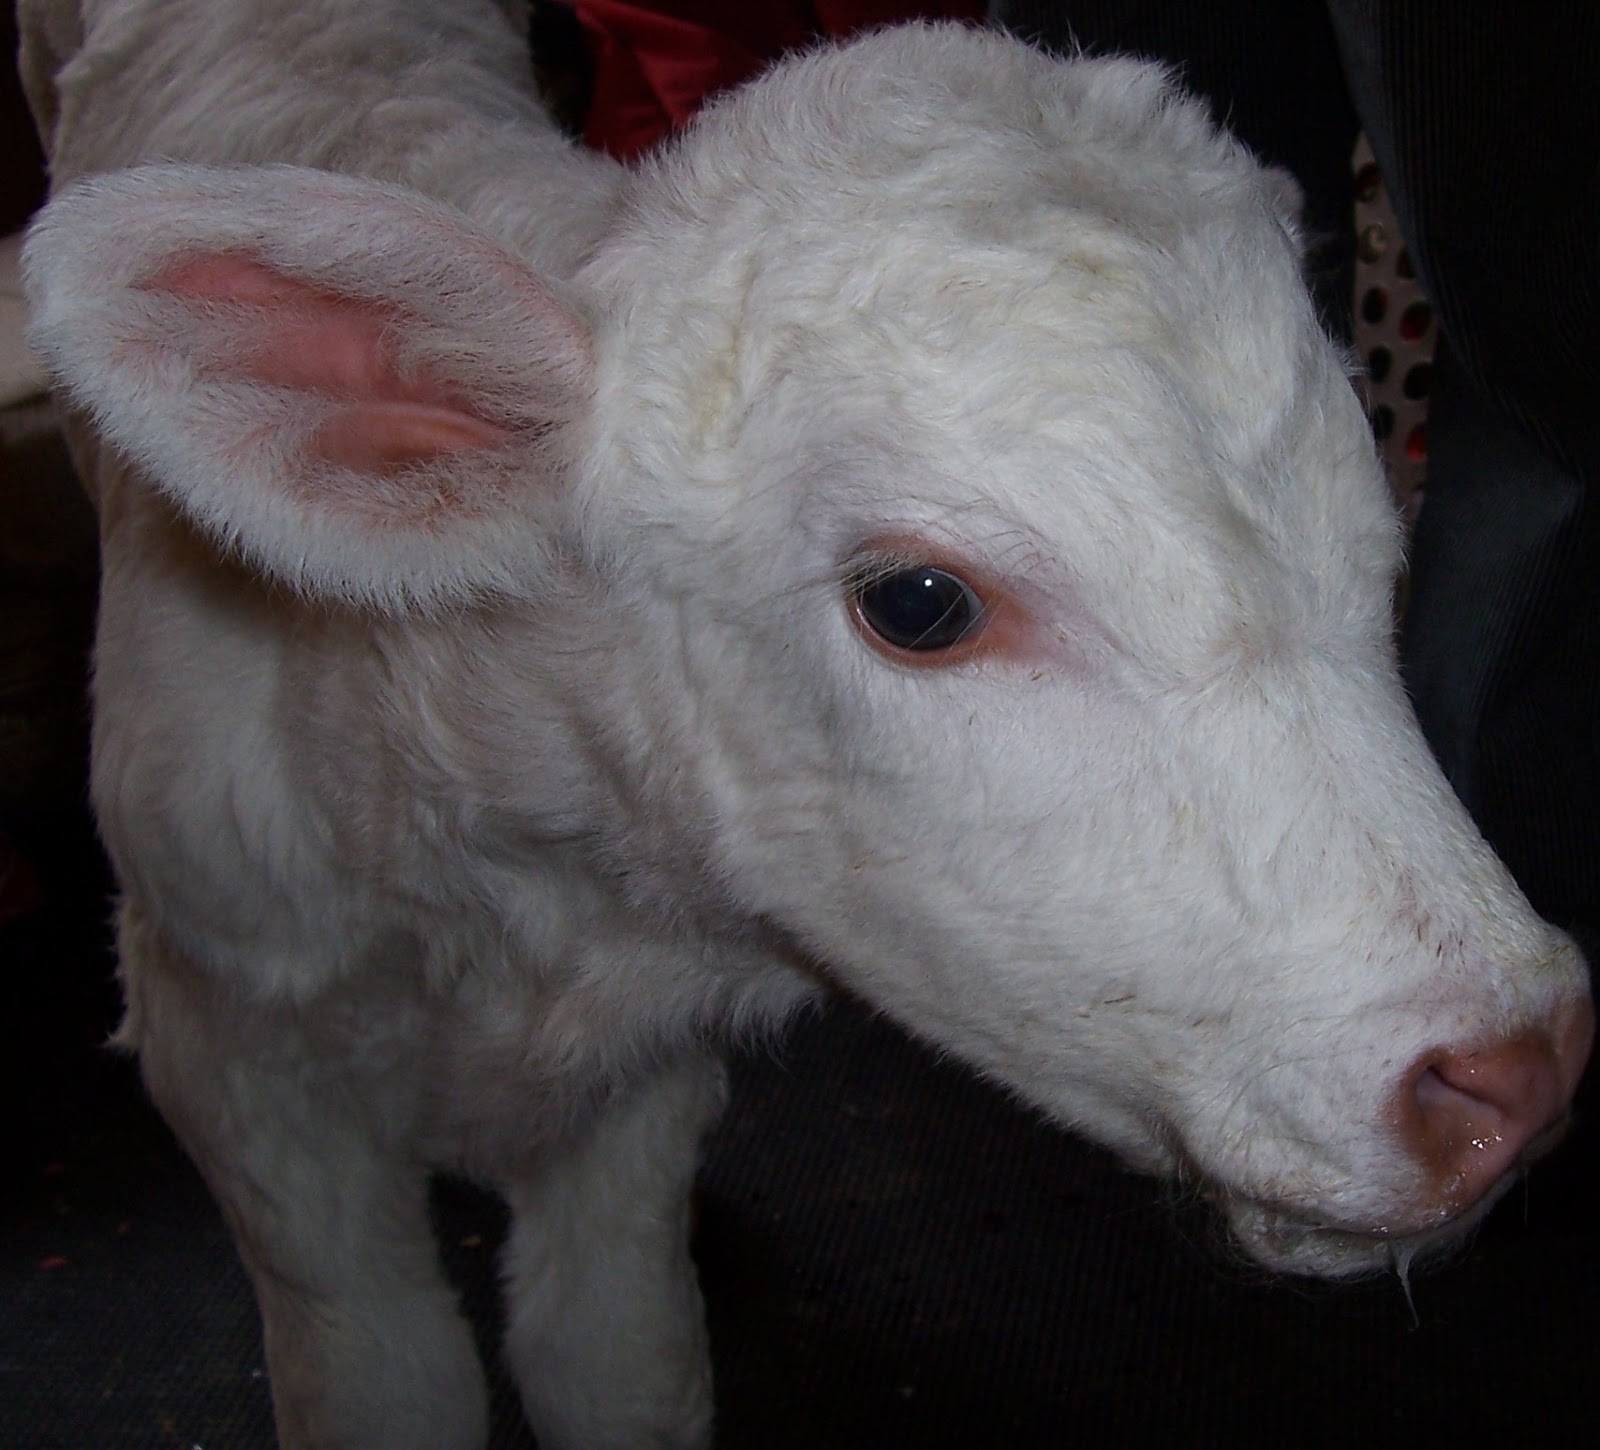
 yes, that is her tongue hanging out. She doesn't quite get keeping it
in her mouth yet. She only weighs about 45 pounds - less than 1/2 of
what our dogs weigh. Pretty small considering most of our calves are
around 100-120 pounds at birth
yes, that is her tongue hanging out. She doesn't quite get keeping it
in her mouth yet. She only weighs about 45 pounds - less than 1/2 of
what our dogs weigh. Pretty small considering most of our calves are
around 100-120 pounds at birth
THURSDAY
little one looked like it might die last night, so into the house it came. I hate dealing with hypothermia. They always look sooo bad. Even with its coat on, just wasn't doing well. So, complete with heating pad, thick rubber mat and blankets, it spent the night indoors.
Got it to eat almost a whole pint this am. Peanut isn't able to feed the baby, though she likes it. Waiting on a call from vet to double check meds we think it needs (we are in a selenium deficient area). Why wait? My bottle expired last year (hadn't needed since then) and I need to be sure it hasn't gone bad. If so, I will go pick some up, but if I can use this it would be easier. I do know that some drugs go bad really quickly and you can really get sick/make things a lot worse if you use them. Hoping this one is ok as it is only a few months.
WEDNESDAY
Has another page. Long story, but this is definitely not the way a normal beef farm runs. Peanut would be long gone on a regular farm as she wouldn't breed for several cycles, but since we do petting zoos and she is one of the stars, she is still around.
Had an accident last summer . . . the bull broke into her pen. Well, last night, the little accident arrived. Cute baby girl. Very small (like Peanut - glad actually as Peanut isn't very big).
Anyway - cold (of course) and calf didn't just jump up and nurse (go figure), so I went out to feed the baby.
Peanut gets one look at the bottle and starts getting really excited. Oh great, even if Peanut is small, 900 pounds of small is still bigger than I am

So, dh gets Peanut looking at treats (aka - molasses covered feed) and then we try to feed the baby. No go on the bottle, so we tubed her. She looks better with colostrum in her tummy. Will do more in a few hours (hopefully she will want the bottle then).
Glad she waited until last night to come as I didn't get home from work until 10:30.
Oh, if you want to catch up on Peanut, the link is Here: http://www.scraprageous.blogspot.com/2010_01_01_archive.html January 20, 2010 and back to December 30th of 2009.
Izzy Update - unfortunately Izzy aborted her baby when she got sick about a month ago. It was bittersweet as there was a good chance Izzy most likely would have died if this had not occurred. After a few days of illness, Izzy is now back up and almost fully returned to her normal, ornery self. She is having fun pushing around the puppies these days as she gets to run around with them while we are out working.
The kids said that Izzy is the new calves aunt. Aunt Izzy doesn't go in the pen, but she does watch.
Oh - as I was asked if someone could help out, in a monetary manner, there is a way. Rather than just sending money, if you like, you can purchase a reusable shopping bag. I have started making various feedbags used on our farm (and others) into reusable shopping bags. You can find information at www.scraprageous.com. The site is still being worked on, or visit the Etsy Shop at https://www.etsy.com/shop/Scraprageous. I also sell on Ebay if you prefer that format, here is the link to one of my auctions: http://www.ebay.com/itm/300876705364?ssPageName=STRK:MESELX:IT&_trksid=p3984.m1555.l2649
Backsliding.
She didn't look good this am - even though she is in the house, she is acting like she is cold. We got her up and she drank her own bottle. Just over a pint, but at least she drank on her own.

Bad side - she fell over rather than laying down. Now she isn't looking so hot. But then, by the time we uploaded photos, she looked just awful again. So why put all this (and the bad photos) here? Because when dealing with hypothermia, one of the most helpful things, to me, was to see the various photos and journal entries I had made when we dealt with Peanut. It sounds weird, but it also lends hope - to know that with a lot of TLC, things can come along.

Well, the camera is now charging - not even enough juice for a single photo. However, she is at least turning her head to sleep like calves normally do - with her nose pointed towards her body.
SUNDAY
Looking a lot better - we took some video as she is getting up and laying down on her own as well as trying to run, sort of, and jump and start sucking on anything that she wanted to explore! She drank 2 quarts and 1 pint today. Hopefully things will continue to improve.
SATURDAY
Improvement
THURSDAY
little one looked like it might die last night, so into the house it came. I hate dealing with hypothermia. They always look sooo bad. Even with its coat on, just wasn't doing well. So, complete with heating pad, thick rubber mat and blankets, it spent the night indoors.
Got it to eat almost a whole pint this am. Peanut isn't able to feed the baby, though she likes it. Waiting on a call from vet to double check meds we think it needs (we are in a selenium deficient area). Why wait? My bottle expired last year (hadn't needed since then) and I need to be sure it hasn't gone bad. If so, I will go pick some up, but if I can use this it would be easier. I do know that some drugs go bad really quickly and you can really get sick/make things a lot worse if you use them. Hoping this one is ok as it is only a few months.
WEDNESDAY
Has another page. Long story, but this is definitely not the way a normal beef farm runs. Peanut would be long gone on a regular farm as she wouldn't breed for several cycles, but since we do petting zoos and she is one of the stars, she is still around.
Had an accident last summer . . . the bull broke into her pen. Well, last night, the little accident arrived. Cute baby girl. Very small (like Peanut - glad actually as Peanut isn't very big).
Anyway - cold (of course) and calf didn't just jump up and nurse (go figure), so I went out to feed the baby.
Peanut gets one look at the bottle and starts getting really excited. Oh great, even if Peanut is small, 900 pounds of small is still bigger than I am

So, dh gets Peanut looking at treats (aka - molasses covered feed) and then we try to feed the baby. No go on the bottle, so we tubed her. She looks better with colostrum in her tummy. Will do more in a few hours (hopefully she will want the bottle then).
Glad she waited until last night to come as I didn't get home from work until 10:30.
Oh, if you want to catch up on Peanut, the link is Here: http://www.scraprageous.blogspot.com/2010_01_01_archive.html January 20, 2010 and back to December 30th of 2009.
Izzy Update - unfortunately Izzy aborted her baby when she got sick about a month ago. It was bittersweet as there was a good chance Izzy most likely would have died if this had not occurred. After a few days of illness, Izzy is now back up and almost fully returned to her normal, ornery self. She is having fun pushing around the puppies these days as she gets to run around with them while we are out working.
The kids said that Izzy is the new calves aunt. Aunt Izzy doesn't go in the pen, but she does watch.
Oh - as I was asked if someone could help out, in a monetary manner, there is a way. Rather than just sending money, if you like, you can purchase a reusable shopping bag. I have started making various feedbags used on our farm (and others) into reusable shopping bags. You can find information at www.scraprageous.com. The site is still being worked on, or visit the Etsy Shop at https://www.etsy.com/shop/Scraprageous. I also sell on Ebay if you prefer that format, here is the link to one of my auctions: http://www.ebay.com/itm/300876705364?ssPageName=STRK:MESELX:IT&_trksid=p3984.m1555.l2649
Wednesday, July 18, 2012
Looking for info on the Bead Spray Class
Check out my other blog here: http://www.scrapbooksandcows.blogspot.com/
Wednesday, May 16, 2012
Looking for the 52 week swap pics?
they are on the other blog http://www.scrapbooksandcows.blogspot.com
In the meantime - check out these beautiful cards that came with the swaps! I so love receiving handmade notes - they always make my day. And a huge plus - I tend to use the fronts on pages later on :P. Anyone who has swapped with me for long has probably seen their card re-purposed as a page element of some type. I save all the beautiful cards!

In the meantime - check out these beautiful cards that came with the swaps! I so love receiving handmade notes - they always make my day. And a huge plus - I tend to use the fronts on pages later on :P. Anyone who has swapped with me for long has probably seen their card re-purposed as a page element of some type. I save all the beautiful cards!

Monday, May 14, 2012
Tried something New
Needle felting!
First rule - be careful not to poke yourself. This may be obvious, but the needles are sharp LOL.
I started with a pansy - nope, doesn't look too much like a pansy, but I figured out the movement with this project.

 Finally - big time now- let's try a sheep!
Well, the ball for the body went fine. The head was ok, but I forgot the neck. However, I think the little guy is kind of cute, so, depending on who is looking, he is either a little bear or a sheep who woke up a bit strange.
 While I have a long way to go with my technique, I sure did enjoy creating these projects. Next up will be more work with flowers. It may not look it, but the pansy was much more difficult than the above animal. I guess maybe it is because little animals are often pretty cute.
First rule - be careful not to poke yourself. This may be obvious, but the needles are sharp LOL.
I started with a pansy - nope, doesn't look too much like a pansy, but I figured out the movement with this project.

Next, I tried a bunny face - hmm - maybe I should have started with a dog face as that is what it looked most like. It had bunny ears, but I felted them down so it looked more dog like.

Well, the ball for the body went fine. The head was ok, but I forgot the neck. However, I think the little guy is kind of cute, so, depending on who is looking, he is either a little bear or a sheep who woke up a bit strange.

Saturday, May 5, 2012
Creativity is on vacation
Working on a class for my www.scrapbookingfun.biz site. Well, when I posted, I had this wonderful idea.
Give it a shot - nothing is working as I had envisioned. Set the mess aside and come back later. Tried later - still nothing working out quite right. However, I did figure one piece - whoo hoo - it is coming along!! Boy did I think happy thoughts too soon. The other pages - still not working. I now have a rather large stack for recycling of stuff I don't like and that didn't work. Sure glad Boy Scouts recycle paper for us.
So, my class will end up being more basic than I thought and not have anything completely original. My mini's all are conglomerations of ideas I have seen all over the web and from books. I only use patterns once, then alter to the size I want. However, as the class is to be completed in about an hour, that is probably good.
No pictures of anything 'new', but here is a photo of a mini I will be putting into a store. It isn't very big (as the lady wants things under $20) and has no embellishments other than scraps, but when I laid out some photos inside - it sure looks really cute with pictures. Believe it or not, this small book can hold over 50 regular photos!
 So, off to create - have a great day!
Give it a shot - nothing is working as I had envisioned. Set the mess aside and come back later. Tried later - still nothing working out quite right. However, I did figure one piece - whoo hoo - it is coming along!! Boy did I think happy thoughts too soon. The other pages - still not working. I now have a rather large stack for recycling of stuff I don't like and that didn't work. Sure glad Boy Scouts recycle paper for us.
So, my class will end up being more basic than I thought and not have anything completely original. My mini's all are conglomerations of ideas I have seen all over the web and from books. I only use patterns once, then alter to the size I want. However, as the class is to be completed in about an hour, that is probably good.
No pictures of anything 'new', but here is a photo of a mini I will be putting into a store. It isn't very big (as the lady wants things under $20) and has no embellishments other than scraps, but when I laid out some photos inside - it sure looks really cute with pictures. Believe it or not, this small book can hold over 50 regular photos!

Thursday, April 26, 2012
Peanut and Walnut Update
I was recently asked about Peanut and Walnut. They are doing well. Peanut tends to be a bit accident prone, but she has recovered from recent injuries (mainly to her horns). She is not an exemplary example of a cow, but she is a wonderful help with petting zoos. She loves kids and doesn't mind them playing with her horns. We will get another photo of her later - my camera card filled, so I have to do some deleting/ordering of pictures before taking photos.
Walnut is now a steer and has been ridden (he doesn't mind, though most riding steers have horns) and learning how to pull a cart.


I love the look of mosaic layouts, but have a really tough time creating. This one was made very fun by using a lot of the swaps I have for school themes! The swaps are from both Scrapbookingfun.biz and the cricut board.

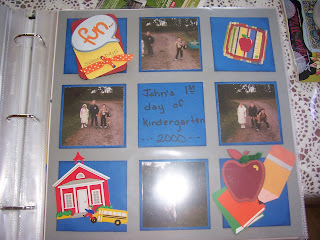
I used a martha punch for this layout, along with some fun techniques I have been wanting to try. I clipped pieces for the story from some October Afternoon papers. The leghorns are looking wonderful these days, however, I was not thrilled with the ones who jumped out of their box and were running around in the back of my vehicle! The Thank You in the lower right corner of the bottom page is the front of a card I received - worked perfect on this layout as I love to repurpose anything I can!


Walnut is now a steer and has been ridden (he doesn't mind, though most riding steers have horns) and learning how to pull a cart.


As you can see, both are doing well and pretty happy to have the rain let up for a few days. I will be adding some recent layouts I finally completed as well. I have been having fun playing with my gypsy and welding - I think I used Country life (maybe) and Alphalicious for the Peanut the Wonder Cow title. Her horns were not very big at this petting zoo.

I love the look of mosaic layouts, but have a really tough time creating. This one was made very fun by using a lot of the swaps I have for school themes! The swaps are from both Scrapbookingfun.biz and the cricut board.


I used a martha punch for this layout, along with some fun techniques I have been wanting to try. I clipped pieces for the story from some October Afternoon papers. The leghorns are looking wonderful these days, however, I was not thrilled with the ones who jumped out of their box and were running around in the back of my vehicle! The Thank You in the lower right corner of the bottom page is the front of a card I received - worked perfect on this layout as I love to repurpose anything I can!


Subscribe to:
Posts (Atom)